If you read my first kombucha post, Choosing to Brew Kombucha with the Intention of Kegging, you likely know that I’ve put of brewing my first batch of kombucha for years. As I think about it, there really is no good reason why I’ve put it off so long, other than…. well…. laziness.
That time had come to an end. I ordered the necessary equipment and ingredients and I was ready to brew my first batch of kombucha and in reading through the instructions that came with my Kombucha Brooklyn starter kit, it seemed like a very simple process.
Brewing Kombucha – The Process
I got the process started by bringing water to a boil in a large pot. The amount of water being boiled was a bit less than half of the total batch size. This water would be used to steep the tea and dissolve the evaporated cane sugar (I still am not quite sure the difference between cane sugar and evaporate cane sugar). Once boiling, I turned off the heat and added 2 tea bags (which I later learned was not enough). The tea bags were left to rest for 20 minutes while I occasionally stirred.
After 20 minutes, I removed the tea bags (or sachets) and stirred in 2 cups of evaporated cane sugar. Sugar is added at 1 cup per gallon, since I was doing a 2 gallon batch, 2 cups were added.
Note that we’re not making sweet tea. The sugar is added for the SCOBY. Without sugar, the bacteria and yeast of the SCOBY cannot grow and there will be no fermentation. Without fermentation, we can’t make kombucha. So if you’re looking at this recipe thinking, “2 cups of sugar? That’s a ton!”, don’t worry, a majority of that sugar will be consumed by the culture of bacteria and yeast.
Once the sugar was dissolved, I added some ice cubes to help further cool the tea before adding it to the fermentation crock. I had pre-added about 1 gallon over water to the fermentation crock prior to adding the tea. After the tea was added, I topped off the crock with a bit more water, covered it with the breathable cloth and set it aside to let it do its thing.
Brewing Kombucha – Fermentation
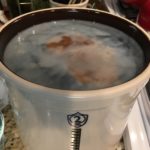 This is the most boring part, but if you’ve brewed beer before, you’re very familiar with the fermentation phase. With beer, you add yeast for fermentation, with kombucha, you add a SCOBY (Symbiotic Culture of Bacteria and Yeast). The SCOBY consumes the sugar that was added during the brew process and is the “magic” behind kombucha (fermented tea).
Fermentation times can vary, but most of the information I found suggested that the kombucha be left to rest at room temperature (preferably above 70F) for about 10-14 days. Being the first time I brewed it, I planned on going on the high side of that range, but as life happened, I ended up leaving my kombucha to sit and ferment for closer to 25 days. From what I read, I expected the final product to taste like vinegar, however, it still had a mildy sweet taste, but it did smell like vinegar. I attribute the preservation of the sweet taste and flavor to the fact that my kitchens ambient temperature over the course of the brew was pretty consistently in the upper 60s (great for fermenting beer!).
I have to admit that after about 3 or 4 days, I pulled the cloth off of my fermentation crock to check out the activity. The 4 inch SCOBYs that I had thrown in were now forming a large SCOBY layer across the entire surface. Apparently this is normal.
Brewing Kombucha – Adding Fruit for Flavor
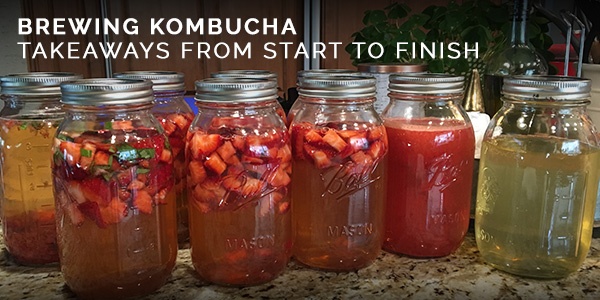
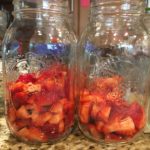
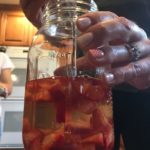
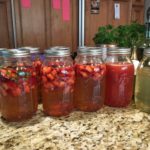
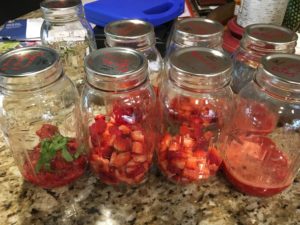 After fermentation was complete, I pulled got my racking cane ready to transfer the fermented tea into a bunch of mason jars with different fruit concoctions in each – most of which were strawberry based. We did 2 mason jars full of each of the following flavors:
- Strawberry Juiced (we juiced fresh, local strawberries) – about 1 cup per 32oz mason jar
- Strawberry Chunks – about 1 cup per 32oz mason jar
- Strawberry Chunks – about 1 cup per 32oz mason jar
- Strawberry Puree & Basil (left over from juicing strawberries) – about 1/2 cup per 32oz mason jar + about 3 sliced basil leaves
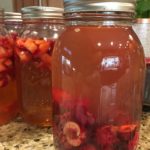
- Cherries (halved) – about 1/2 cup per 32oz mason jar
Once we had our fruit in our mason jars, we racked the kombucha into each, getting each as close to full as possible. Note: We topped off each jar a bit more than pictured.
Brewing Kombucha – Takeaways
To be honest, I was very surprised how quick and straightforward the brewing process was. Coming from homebrewing beer, for some reason, I thought it was going to be a bit more “involved”, but it was really simple and straightforward. Flavoring kombucha is going to be a lot of fun. There are so many flavors and ideas that I want to try, but while strawberries are in season…. chances are that my next batch will also be strawberry flavored.
Stay tuned for the next post where I’ll let you know if this actually ends up tasting okay! 😉
Connect With Us!
We want to know if our content is helpful and the best way is if you let us know. You can contact us on Facebook, Instagram, Twitter or through our Ket Outlet Contact Page. We look forward to connecting with you! Cheers!




Leave a Reply